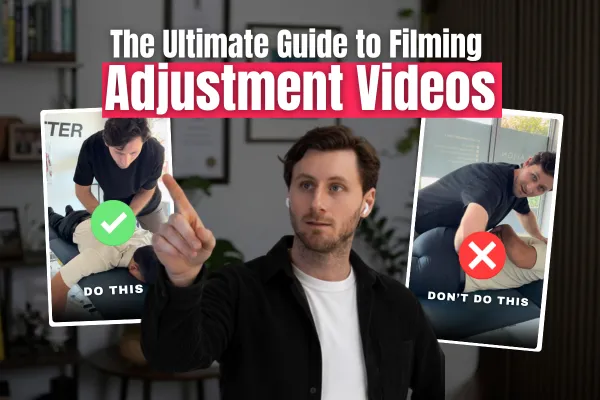
Want More Patients? Start Filming Your Adjustments Like This.
The complete chiropractic guide to filming professional, trustworthy, scroll-stopping adjustment footage.
TL;DR
Most chiropractors film adjustment videos the wrong way — bad angles, bad lighting, awkward patient positioning, and footage that cheapens the brand instead of elevating it.
This guide teaches you exactly how to film cervical, thoracic, lumbar, and SIJ adjustments properly so your ads, content, and brand look clean, trustworthy, and professional.
Filming your adjustments the right way:
Builds credibility
Reduces patient fear
Demonstrates your skill
Makes your ads stronger
Elevates your brand
Produces content that attracts better patients
If you want your marketing to work, your footage must look like your care — confident, controlled, and professional.
This guide shows you exactly how to do that.
Why Adjustment Footage Matters
Adjusting is what chiropractors are known for — and yes, it's satisfying to watch. That’s why so many chiropractic videos online focus only on the crack.
But you and I both know your care is not about the sound.
It’s about the skill, intent, precision, and process behind every adjustment. And you’re probably tired of people coming in just for “a crack.”
That’s why your adjustment footage matters:
📌 It should elevate your brand, not cheapen it.
📌 It should showcase professionalism, not awkward angles.
📌 It should highlight your technique, not distract from it.
📌 It should make your clinic look confident and trustworthy.
When filmed correctly, adjustment footage becomes one of the most powerful tools in your marketing. It adds credibility, creates familiarity, and instantly differentiates you from every other chiropractor running generic content.
Adjustment Categories
Just like your textbooks, there are four main categories of adjustments you'll film:
Cervical Spine (CS)
Thoracic Spine (TS)
Lumbar Spine (LS)
Sacroiliac Joint (SIJ) – optional
LS and SIJ can look similar to the untrained eye, so don't overthink it. What matters most is understanding angles, positioning, and keeping footage professional.
Each region has its own motion and feel — capturing them correctly makes your videos clean, accurate, and confidence-building.
Filming Tips (The Fundamentals)
Think of your viewer while filming. You’re not teaching a seminar for chiropractors — you’re showcasing your care to future patients.
1. Camera Position
Always position the camera on the opposite side of the chiropractor.
You want the viewer to see you working, not your back.
The chiropractor and camera should face each other as much as possible.
2. Quality Settings
Use Cinematic Mode if your phone has it
Clean your lens — fingerprints destroy quality
Natural light > overhead clinic lights
3. Avoid Awkward Angles
This is where most chiropractors fail.
❌ No filming from under the patient
❌ No filming behind the chiropractor
❌ No “patient butt” angles (especially LS/SIJ)
Awkward = unprofessional = ruins trust.
4. Don’t Fall for the Gear Trap
Expensive equipment does NOT fix bad technique.
All the footage in this guide series was filmed using:
an iPhone
a $30 tripod
Rode Wireless Go II or DJI Mic 2 (recommended)
Skill first. Tools later.

Angus Showing That The Only Gear You Need is A Phone And A Stand
Cervical Adjustments
Cervical adjustments are typically filmed in either a supine or seated position.
For supine adjustments, avoid “thumbing up” the patient, this happens when you get too square and stand directly over them, which results in an unflattering angle with multiple chins in the frame. Instead, take a small step back and to the side of the patient. This gives you a clear view of the chiropractor, their hands, and the patient looking calm and relaxed. As a general rule, stand on the side opposite the direction the adjustment is going, so the movement opens up toward the camera.
Example:
For seated adjustments, you can film square to both the chiropractor and the patient at eye level for a professional, balanced look. If you want a more natural “in the room” feel, move slightly to the side on the chiropractor’s side and film the adjustment going away from you. This gives a similar visual flow to the supine adjustment and keeps the focus on the chiropractor’s skill and connection with the patient.
Example:
Thoracic Adjustments
Thoracic adjustments can be filmed in several positions; prone, supine, standing, or seated, and each has its own best angles.
For prone adjustments, think low and long. Stay on the opposite side of the chiropractor, position yourself near the head of the patient, and film almost upward along the body. Keep the chiropractor’s hands and, if possible, their face in view. This angle gives a clear sense of skill and control without crowding the shot.
Example:
For supine adjustments, follow the same principles, but you can stand a little higher since the patient’s face is angled upward. This lets you capture both the chiropractor’s and the patient’s expressions, adding warmth and connection to the footage.
Example:
For seated adjustments, use the same approach as cervical filming. Always be on the chiropractor’s side so you can see their face and hands clearly. Never stand behind the chiropractor, it hides both the technique and the connection.
Example:
For standing adjustments, the same rules as seated apply. Stay on the chiropractor’s side and frame both faces if possible, keeping the movement natural and professional.
Example:
Lumbar & SIJ Drop Adjustments
Lumbar and SIJ adjustments are filmed in either a prone or supine position.
For prone adjustments, the same rules as thoracic filming apply, think long and low. Stay on the opposite side of the chiropractor, positioned near the head of the patient, and film down the body. This keeps the chiropractor’s hands, focus, and intent in view while maintaining a professional angle. Never film from the patient’s feet, as this angle looks awkward and unflattering.
Example:
For supine adjustments, maintain a similar setup to cervical or thoracic filming. Keep the chiropractor and patient visible from the side, showing calm, control, and connection. The key is to make the footage look natural and trustworthy, not staged or clinical.
Example:
Lumbar & SIJ Rolls (The One Rule Break)
This is the one adjustment where you break the “camera opposite the chiropractor” rule. The reason is simple, if you stay opposite during a side-lying adjustment, the patient’s butt ends up between the chiropractor and the camera.
It’s the main reason so many chiropractic videos go viral for the wrong reasons 🍑.
To avoid this, position yourself above the patient and point the camera slightly downward. This keeps the focus on the chiropractor’s skill and expression rather than the patient’s body position.
The camera angle should be higher than a prone adjustment, since both the chiropractor and patient are elevated in this position. Think of it like filming a supine thoracic or drop adjustment, professional, clean, and focused on connection, not the crack.
Example:
DON’T DO THIS
FAQ: Filming Chiropractic Adjustments
1. Why do my adjustment videos look unprofessional?
Because the angle is usually wrong — filming from behind, from below, or from the feet ruins the shot.
2. Do I need expensive gear?
No. Your iPhone + tripod + decent mic is more than enough.
3. Should the patient’s face be visible?
When possible, yes — it builds trust and shows comfort.
4. What length is ideal?
5–20 seconds for adjustment clips.
60–90 seconds when used inside ads.
5. Can I use these clips in ads?
Absolutely — adjustment clips paired with a Talking Head ad dramatically improve performance.
6. What if I film something awkward?
Delete it. Protect your brand at all costs.
Join The 28-Day Ad Reset
Inside the 28-Day Ad Reset, we use your adjustment footage to create:
Talking Head ads
Fly-on-the-wall ads
POV ads
Outcome stories
Overlay ads
Creative variations that lower CPL and increase trust
Your adjustment footage becomes part of a full creative library that compounds over time — not a one-off clip.
Good footage = better ads = better patients = higher trust.
If you want this done properly — with scripts, filming direction, editing, launching, and tracking — the Ad Reset is where we build it with you.
📌 Additional Resources
🏫 Join The Free Skool Community — The Influential Chiropractor
Free trainings, templates, ad breakdowns & resources.
https://skool.com/influential-chiropractors
🧭 Take the Clinic Growth Audit (Free)
Find out exactly what level your clinic is operating at — and what to build next.
www.pracdev.com/marketing-audit
💰 Download the Profit-First Marketing Roadmap
See the 5 Levels and get your personalised “next step” plan.
www.pracdev.com/5-levels
🎥 Join The 28 Day Ad Reset
5 new chiropractic ads every month + scripts + CRM + systems.
www.pracdev.com/ads
